
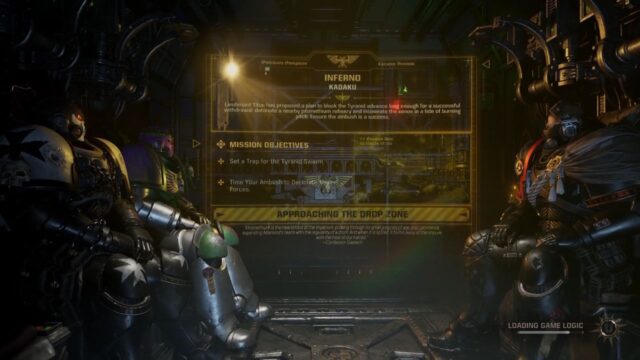
Warhammer 40K: Space Marine 2’s first PvE operation, Inferno, introduces players to the game’s co-op mode, featuring distinct classes and reinforced enemy forces.
In this mission, you’ll team up with two fellow Astrates to infiltrate the Promethium Refinery, detonate critical bombs, and face off against a relentless Tyranic Swarm. This guide provides a step-by-step walkthrough to help you easily complete the inferno mission.
1. How to Complete the Inferno Mission
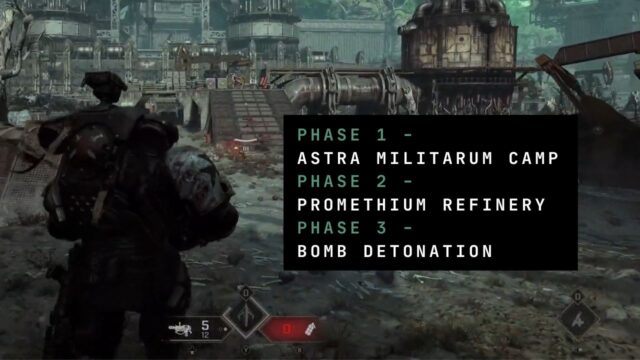
In Warhammer 40,000: Space Marine 2’s Inferno mission, players must detonate bombs in the Promethium Refinery to disrupt the Tyranid swarm’s advance.
To achieve this objective, players must first reach the Astra Militarum Camp and locate demolition codes, then protect generators in the Promethium Refinery from relentless Tyranid waves. Lastly, players must detonate the bomb and extract via shuttle, escaping the swarming Tyranids.
This mission demands cooperative gameplay with up to three players, leveraging class-based abilities to succeed in this challenging and immersive experience.
1. Preparing for The Mission
For the Inferno mission, consider playing as either the Tactical or Heavy Class, as they excel at handling large Tyranid groups.
- The Tactical Class boasts exceptional damage output and signature abilities, making short work of swarming enemies.
- Meanwhile, the Heavy Class unleashes devastating Primary Weapon options to annihilate Tyranid hordes.
- Alternatively, the Bulwark Class is an excellent choice for those who prefer a tanking role, providing a sturdy defense and protecting teammates from the relentless Tyranid assault.
To efficiently clear the Inferno mission’s numerous low-tier Tyranid enemies, consider the following loadout:
- Power Sword: Effective against Hormagaunts and Warriors, especially with charged attacks.
- Bolt Carbine: High DPS for close-quarters combat against Tyranid Warriors and Ravagers.
- Melta Gun: Similar to Bolt Carbine, but with reduced range.
- Plasma Pistol: Charged shots deal moderate AoE damage.
2. Phase 1 – Astra Militarum Camp

- Engage Tyranid Warriors at melee range and parry their attacks to create openings for gun strikes.
- If playing as Heavy Class, maintain distance and fight from afar. Eliminate Tyranids in the bridge area.
- Prevent them from calling for reinforcements to avoid facing additional enemies and a Zoanthrope duo.
- Use Finisher moves to kill nearby Hormagaunts if reinforcements are called instantly.
- Refill ammo reserves and gather nearby loot.
- Find demolition codes on fallen soldiers’ bodies and search all dead troopers to collect codes.
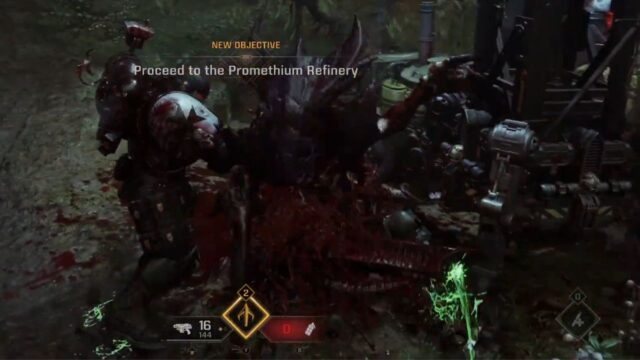
3. Phase 2 – Promethium Refinery
- Ensure your team has sufficient ammo before leaving the jungle. and be prepared for a large Tyranid force.
- Prioritize executing the Hive Warrior to execute most of the Hormagaunts. If ambushed by a Lictor, parry its attacks and perform a gun strike.
- Protect the generators from Tyranid waves inside the facility; they converge on Generator Four (lower floor). Eliminate the Hormagaunts and Warriors in the first wave.
- Identify the Zoanthrope without a green energy shield and focus fire on the vulnerable Zoanthrope.
- Switch targets when the vulnerable Zoanthrope gains a shield. Repeat this until all Zoanthropes are eliminated.
- Locate the Melta Bomb next to the ammo stockpile. Use the Melta Bomb on the Extremis enemy in the next wave.
- Exit the refinery and enter the adjacent room. Take the elevator to reach the detonation controls outside.
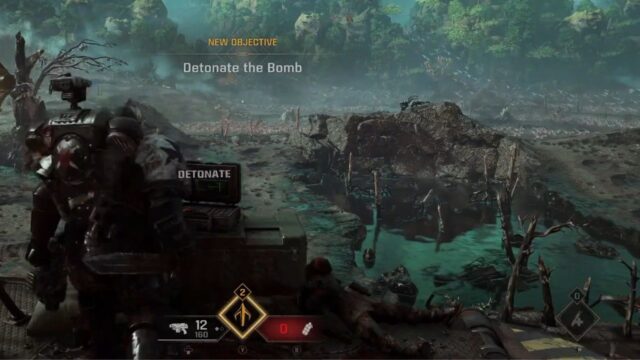
4. Phase 3 – Bomb Detonation
- To complete the mission, defeat waves of Tyranids and detonate the bomb. However, simply holding position isn’t enough; as the objective won’t update until enough enemies are eliminated.
- Defend against initial Tyranid waves by focusing on Hormagaunts near the refinery front, using grenades and Chainsword swings.
- Prioritize eliminating ranged Warrior units on the refinery platform. Prepare for Tyranids spawning on the platform through a back entrance.
- A Lictor will spawn shortly after, so execute a Warrior to kill most Hormagaunts and bait the Lictor out of hiding. Then, parry the Lictor and have all players gun it down while staggered.
- Detonate the bomb on the landing platform and immediately board the evacuation shuttle. Ensure all squad members are on board for successful extraction.
With this guide, you’re now equipped to tackle the challenging Inferno mission in Warhammer 40,000: Space Marine 2. Remember to choose your loadout wisely and coordinate with your teammates for maximum success.
Good luck, Space Marines!
2. About Warhammer 40,000: Space Marine 2
Warhammer 40,000 Space Marine 2 is a third-person shooter hack and slash developed by Saber Interactive. The gameplay involves fighting Tyranid hordes while interchanging between melee and shooting attacks to defend the Imperium.
Apart from the thrilling single-player campaign, the game also offers a unique cooperative mode named Operations, and three 6v6 competitive multiplayer modes called Annihilation, Seize Ground, and Capture and Control.

![[SOLVED] Purge Them All Achievement Bug Fixes – Warhammer 40K: Space Marine 2](https://www.epicdope.com/wp-content/uploads/2024/09/Warhammer-40000_-Space-Marine-2-2-640x360.jpg)


No Comments on Warhammer 40K: Space Marine 2 – How to Complete the Inferno Mission