Driven from his home by a catastrophic artifact-related fire, Skif ventures into the unforgiving landscape of The Zone. Although artifacts are plentiful within the Zone’s boundaries, they rapidly deteriorate outside.
However, by using these powerful objects within the Zone, you can gain advantages in your survival. This guide will walk you through finding and farming artifacts in STALKER 2.
1. How to Find Artifacts in STALKER 2?

In STALKER 2: Heart of Chornobyl, acquiring artifacts can be achieved through various means, but one of the most effective and reliable methods involves tracking down groups of anomalies. These anomalies are hazardous natural phenomena that pose a significant threat to your character’s safety.
Scattered throughout The Zone, you’ll discover clusters of anomalies, each typically containing an artifact. The artifacts obtained from these groups are randomly generated, allowing you to exploit this feature to your advantage. By saving your game before attempting to retrieve an artifact, you can reload and repeat the process until you acquire one that meets your needs.
i. Locating the Artifacts
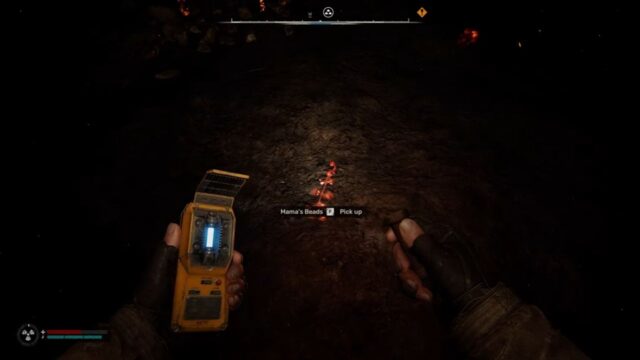
Your first encounter with anomalies and artifacts will occur after exiting the mobile lab during the ‘There And Back Again’ quest. To locate your first artifact, follow these steps:
- Equip your detector (default keybind is ‘7’ on PC, but check your settings to confirm).
- Move in the direction where the detector’s blue light becomes more intense.
- Approach the artifact’s location carefully, as you’ll need to get very close for it to emerge from the ground.
- When the artifact appears, you’ll notice a nearby glow and the detector’s blue light will deactivate, indicating you’ve successfully found the artifact.
ii. Upgrading the Detector
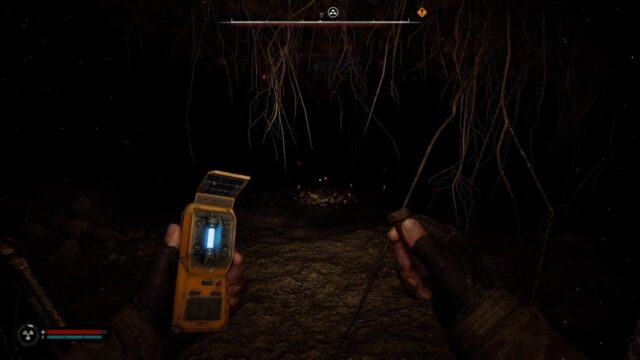
While the Echo Detector is introduced in the game’s opening mission, it doesn’t provide clear direction or distance to the artifact. Fortunately, you can obtain a more advanced detector, such as the Bear Detector or Velese Detector, which offer significant improvements.
| Detector | Usage |
|---|---|
| Bear Detector: Purchased from a shop in Yaniv for 5,400 coupons. | When you see a green pip, simply walk in that direction and monitor the meter. The meter will gradually fill up, and once it’s completely full, you’ll know you’ve reached the spot where the artifact will spawn. |
| Veles Detector: Purchased from a shop in Yaniv for 9,000 coupons. | The Veles Detector is the most easy to use. It shows a red dot where the artifact is. Just look at the detector, walk to the red dot, and you’ll find the artifact. |
You can find other detectors by completing two side quests early in the game.
| Quest | Detector |
|---|---|
| Budmo! | During this quest, you can loot the stash located near the power transmission pylon. You’ll find a superior detector that provides distance readings of up to 100 meters, making it easier to track down artifacts. |
| A Sign Of Hope | Completing this quest will reward you with an advanced detector, regardless of the choices you make during the quest. This upgraded detector provides two valuable features: it indicates the direction of the artifact and your proximity to it. |
2. Where to Farm Artifacts in STALKER 2?

For farming artifacts, we suggest heading to the scorched yard near the Helicopter Base in the Duga region, situated in the southwestern part of the map. This location boasts an unusually high artifact respawn rate within its anomaly fields.
When exploring this area, be cautious of the anomalies that deal fire damage. To protect yourself, make sure to wear a suit with thermal resistance and equip any additional anomalies that offer fire protection.
Due to the high respawn rate in this area, your detector will frequently beep, signaling the presence of another nearby artifact. If the beeping stops, simply walk a short distance away and the detector should start beeping again.
Some of the best artifacts to look out for are:
| Artifact | Effects |
|---|---|
| Weird Ball | Reduces bullet damage in combat, particularly when standing still. |
| Tourist’s Breakfast | Increases chemical protection (medium); causes radiation build up (medium). |
| Pebble | Increases physical protection (weak) and endurance (weak); causes radiation build-up (weak). |
| Chocolate Bar | Increases electrical protection (weak); causes radiation build-up (weak). |
| Slug | Increases radio protection (weak). |
| Hypercube | Increases bleeding resistance (maximum) and thermal protection (maximum); causes radiation build-up (maximum). |
With these tips and upgraded detectors, you’ll be well on your way to collecting the artifacts you need to survive in the Zone. Have fun artifact hunting in STALKER 2: Heart of Chornobyl!
3. About S.T.A.L.K.E.R. 2: Heart of Chornobyl
S.T.A.L.K.E.R. 2: Heart of Chornobyl is a next-gen sequel that promises a thrilling experience. This highly anticipated game combines the best elements of action, survival, and horror, set in the hauntingly beautiful Chornobyl Exclusion Zone.
In this immersive game, you’ll play a major part in a non-linear story that unfolds in a post-apocalyptic world. With the fate of the Zone in your hands, you’ll face tough choices and challenges that will test your survival skills.
Are you ready to dive into the heart of Chornobyl?




No Comments on Treasure Hunt – How to Find and Farm Artifacts in STALKER 2