Following the intense train ride in Chapter One and the confusing station in Chapter Two, Chapter Three: Descent plunges us into the claustrophobic confines of an elevator.
Get ready to tackle even more mind-bending puzzles and brain teasers as we navigate this endless loop of challenges and mysterious locations.
1. Roblox Terminal Escape Room Chapter Three
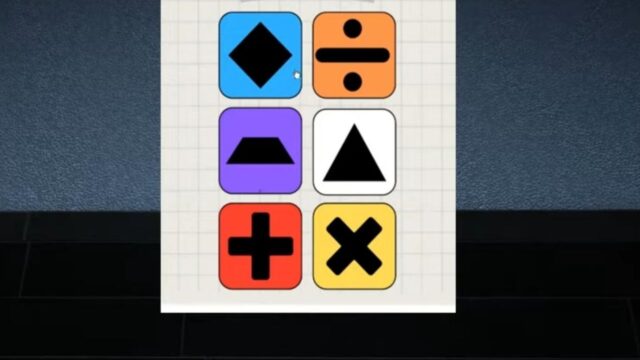
“Reminder: All elevators are equipped with unique codes.”
In Roblox Terminal Escape Room Chapter Three, unlike the first two chapters, which had more universal solutions, the elevator puzzles are highly randomized, with unique codes for each player. To overcome this challenge, use the methods below to decipher your codes.
As you advance through the chapters, expect puzzles to intensify, completion times to lengthen, and tension to rise. but don’t worry – with our walkthroughs, you’ll have the tools to overcome the challenges and escape successfully.
i. How to solve Elevator Puzzle
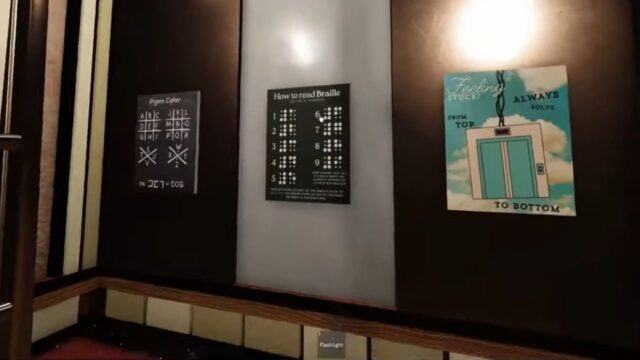
- To escape the elevator, you will need a four-digit code. Follow the poster’s instructions to “Solve from top to bottom.”
- Open the vent, climb the ladder, and find the code on the wall above the elevator. Back in the elevator, find the Pigpen cipher notice.
- Use the cipher to decode the symbols in the elevator shaft, revealing a message – count the shapes on the elevator shaft walls to get the first number.
- Learn to read Braille using the poster in the elevator. Match the light pattern above the poster to a Braille pattern to get the second number.
- Use the Iguana Identification poster to find the third number. Match the pattern on the poster to the border at the bottom of the elevator.
- Examine the Archery Practice poster and the elevator’s carpet floor, which resembles an archery target. Count the floor squares with a brighter red tinge, add them up using the chart, and use the total score as your fourth digit.
- Enter the four-digit code, and the elevator doors will open.
ii. How to solve Colored Boxes Puzzle
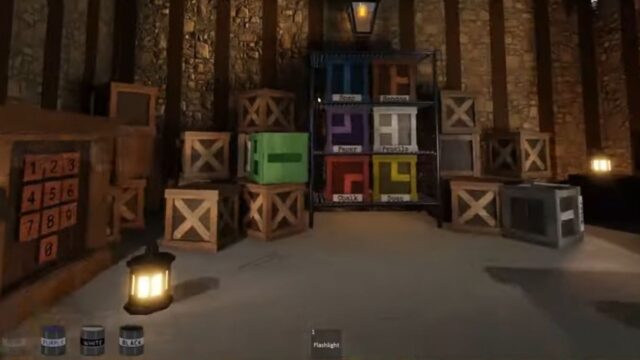
- Collect every Box and Poster in the second area, exploring every room thoroughly.
- Place the collected materials in the designated spots in the room with the boxes and locked wooden box.
- Find the “Math Design” pages scattered throughout the environment. Arrange the boxes to match the color pattern on each “Math Design” page.
- Locate the corresponding “App Design” sheet for each “Math Design” page. Use the “App Design” sheet to determine the item each box represents.
- When correctly arranged, the boxes will spell out a number. Repeat this process for all four sets of sheets to obtain a four-digit code.
- Enter the code to unlock the wooden box, and claim the Paint Can, Key1, Coin1, and white sheet.
iii. How to solve Paint Cans Puzzle
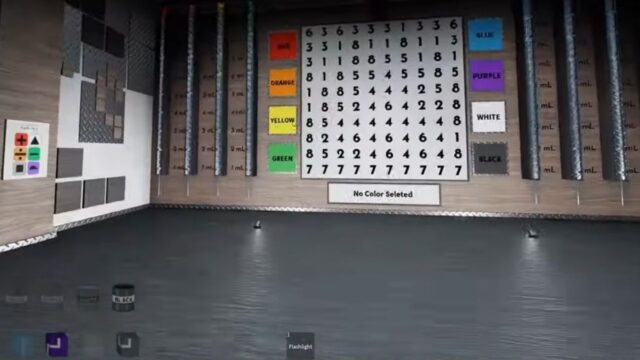
- Gather all the Paint Cans, ensuring they appear in your inventory.
- Explore the area to find numbers and colors on various surfaces (e.g., “2 = Yellow”). Note these combinations.
- Proceed to the room with the large white panel featuring numbers and your Paint Cans. Paint each number with its corresponding color.
- Once all numbers are painted, examine the poster on the wall asking, “All finished painting?” Identify the four hidden colors in the text.
- Check the paint supply for each color to obtain a digit. For example, if the text mentions “blue” and the blue paint is filled to the 3ml line, the digit is 3.
- Match the four secret colors to their corresponding paint supply levels (in order) to form a four-digit code.
- Enter this code on the wall behind you to unlock the box on your right. Inside, you’ll find Key2, Coin2, and a sheet.
iv. How to solve Newspaper Puzzle
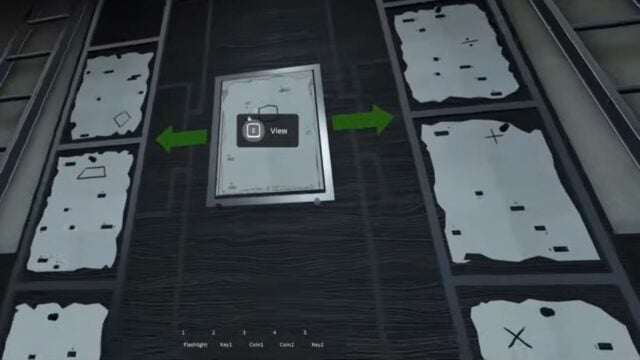
- Head to the Newspaper room and pick up the newspaper on the floor.
- The newspaper outlines the correct order for arranging the posters, indicated by shapes like MINUS, TRI-ANGLE, and SQUARE.
- Place the sheet with the first symbol (e.g., Plus) in the middle section. Rearrange the words on the sheet in numerical ascending order (1, 2, 3) to form a sentence.
- Follow the instructions in the sentence. For example, if it says “The Number Of Yellow Paint Squares,” count the yellow-painted squares in the paint room to get the first digit.
- Repeat this process for the remaining three sheets mentioned in the newspaper clue to obtain all four digits.
- Enter the four-digit code into the locked box below the newspaper puzzle. If correct, the box will unlock, rewarding you with Key3 and Coin3.
v. How to solve Arcade Puzzle

- Enter the Arcade games room and collect Coin4 from the top of an arcade cabinet.
- Insert a coin into each of the four functioning arcade machines and note the number of tickets dispensed (e.g., 5, 15, 50, and 100 Tickets).
- Examine the “Pick Your Prizes” sign above the prize counter. Choose four prizes, each with capitalized letters that spell out a word.
- Type the word into the cash register to unlock it and claim the key inside.
vi. How to solve Nursery Room Puzzle
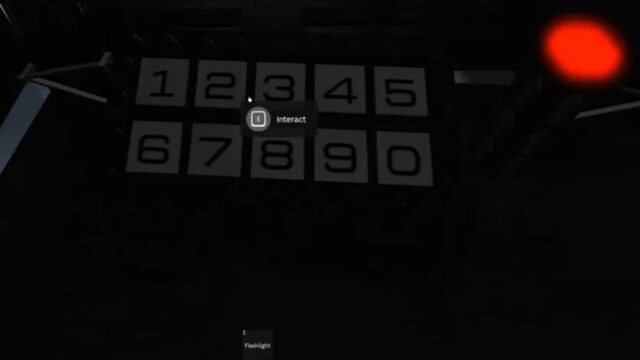
- Unlock The Nursery using the four keys.
- Read “Ms. Potata’s Clean Up Rules” on the wall and find the posters scattered around the room.
- Form words using the blocks, moving clockwise from the entrance. Note the numbers (1-4) on each tower of blocks, indicating the order for inputting the code.
- Stand on the red block with each poster and look down to see the number formed by the red blocks.
- Record the number corresponding to each poster, along with its block number (1-4). For example, if the Cloud poster’s red block formation spells out “7” and its block number is “2,” the second digit of the code is 7.
- Repeat this process for all word blocks to obtain the four-digit code. Climb to the top of the room using the blocks and enter the code into the elevator code device.
You’ve made it through another set of challenges, but don’t think you’re out of the escape room just yet! There are still more puzzles to solve, more codes to crack, and more surprises waiting for you.
Stay tuned for the next installment, where we’ll dive back into the world of Roblox Terminal Escape Room and tackle even more brain-twisting puzzles.
2. About Roblox
Roblox is a popular online game platform which lets players create their own games and play games made by other users. It is developed by Roblox Corporation and is available on Microsoft Windows, Xbox One, Xbox Series X/S, Android, iOS, Fire OS, and Mac.


No Comments on Descent – Roblox Terminal Escape Room Chapter 3 Walkthrough