
Flintlock: The Siege of Dawn is an action-packed RPG that combines elements of Soulslike games, and if we know anything from playing these famous FromSoft titles, it’s that survival is key to preserving your hard-earned progress.
While Nor’s weapons and skills are easy to upgrade, increasing her health requires more effort and exploration.
There are two ways to upgrade her health: refilling healing flasks by clearing undead hamlets and finding hidden Inaya shrines that increase her max health.
1. Inaya Shrines And Healing Flasks in Flintlock
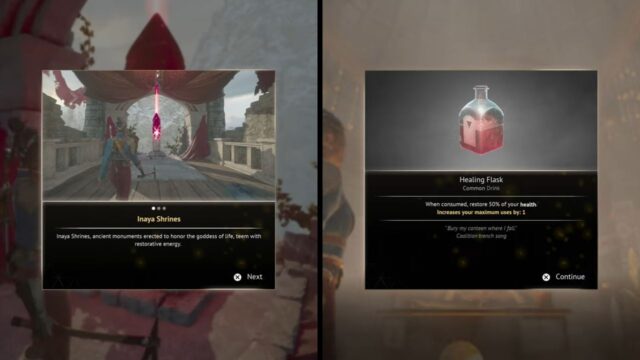
To permanently boost Nor’s health, seek out Inaya Shrines, recognizable by their red glow and obelisk shape, scattered across the map. On the other hand, temporary health boosts come from liberating hamlets and collecting healing flasks as rewards from the host at the local coffee shop.
Interacting with an Inaya Shrine by holding the “E” key permanently boosts Nor’s health by a small amount. Collecting the power of all eight shrines earns the “Small Mercies” achievement.
Meanwhile, Nor’s primary means of healing is through flasks, which can be used by pressing the Square button on PlayStation or the X button on Xbox, restoring her health.
2. Locations of All Inaya Shrines
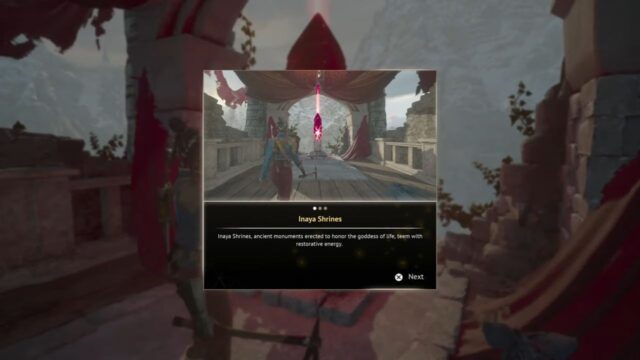
In the world of Flintlock: The Siege of Dawn, Inaya, the goddess of life, has left her mark through shrines scattered across the map. These sacred sites hold the power to increase Nor’s maximum health, making them a valuable discovery.
With nine shrines hidden across the realm of Kian, including four in Three Peaks, four in Wanderer’s Rest, and a final shrine near the game’s climax, the journey to uncover them will be rewarding. Though visible from afar, these ancient monuments can be challenging to track down, but the payoff is worth the effort.
Here are the locations of all nine Inaya Shrines in Flintlock: The Siege of Dawn.
I. Inaya Shrines in Three Peaks
The starting region of Three Peaks has four Inaya Shrines. Having more health during the early stages of the game is invaluable, so you may want to beeline for these four spots first and permanently increase Nor’s health bar before moving forward to the next regions.
Below, you’ll find the locations of all the Inaya Shrines in Three Peaks, listed in the order you’re likely to encounter them as you progress through the game.
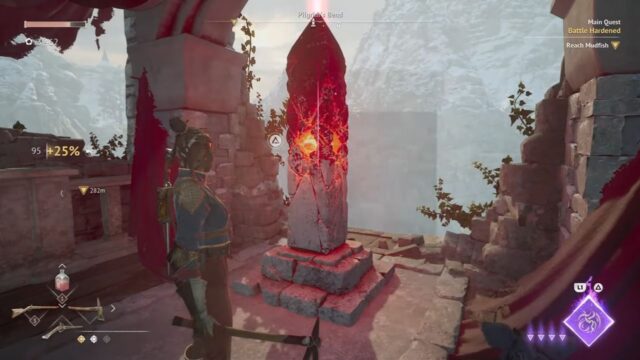
Pilgrim’s Bend Inaya Shrine
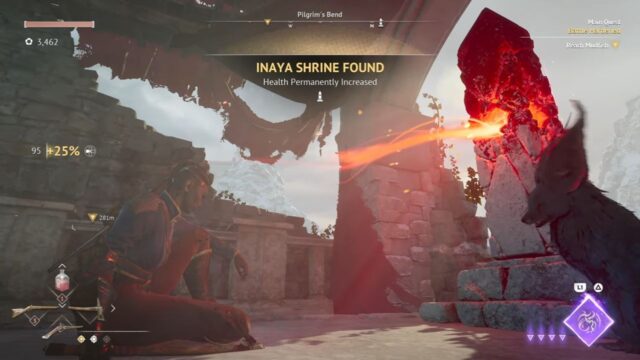
- During the Battle Hardened main quest, you’ll arrive at Pilgrim’s Bend, where you’ll find the first Inaya Shrine.
- From the Campsite, head southeast to the ruined watchtower.
- Circle around to the rear and jump across the gap to the ledge.
- Climb up, fighting off bandits along the way, and claim the shrine at the top.
Rosy Mile Inaya Shrine

- From Pilgrim’s Bend, take the Rosy Mile road and look for an obelisk with a red beam on the left, just past the lodestone.
- Cross the river and climb the hill opposite the water wheel.
- Use the crates to access the top scaffold on the right, where you’ll find the Inaya Shrine.
Foglands Inaya Shrine
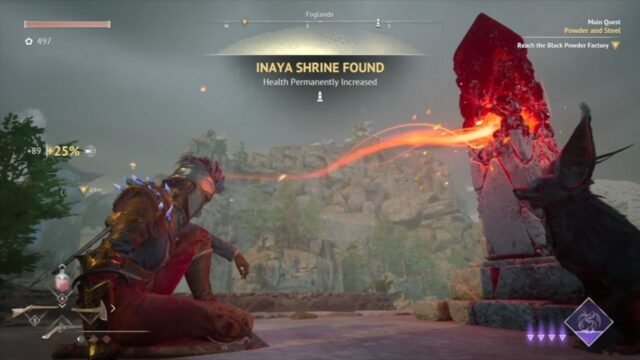
- Beyond Whitebridge, when reaching the ruined castle in the Foglands, drop into the ravine beneath the broken bridge and take the right path.
- Find the skull on your right, which opens a rift to higher ledges and the monument.
- Defeat the enemies there and explore left to discover the Inaya Shrine.
Pitman’s Gate Inaya Shrine

- To reach this Inaya Shrine, head to Pitman’s Gate.
- In the town square, interact with the skull to create a rift, then jump and dash to grab the cliffside ledges.
- Walk east along the cliff wall, where you’ll find a climbing route that leads to the Inaya Shrine.
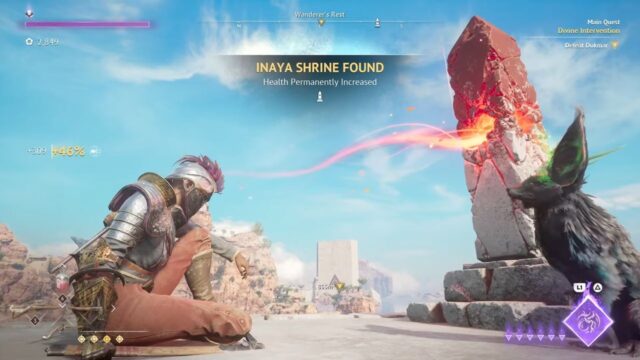
II. Inaya Shrines in Wanderer’s Rest
In the Wanderer’s Rest region of Flintlock: The Siege of Dawn, you’ll again find four Inaya Shrines. Start from the western desert area to the eastern City of Sibyl to discover these sacred sites. As you explore, you’ll also learn the significance of the shrines to Enki.
Nomad’s Coast Inaya Shrine
- Halfway between Nomad Coast and Cape Reunion, to the east of the Nomad’s Coast Lodestone, climb the cliff.
- A skull on the cliffside will create rifts to an inaccessible island where you’ll discover a small obelisk on the coast.
Jagged Ascent Inaya Shrine
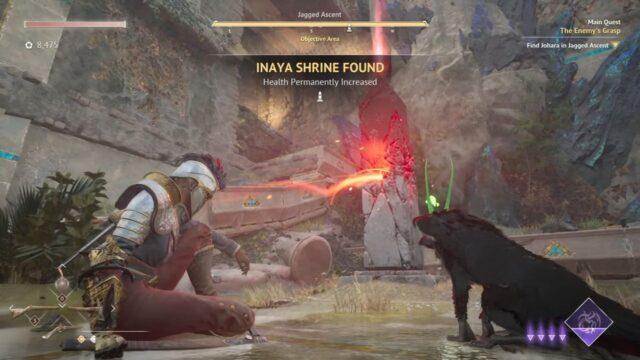
- You’ll find this Shrine as part of the main story as you’re progressing through The Enemy’s Grasp main quest.
- As you climb the Jagged Ascent, searching for Johara, follow the sloping path past the armored insectoids and defeat the cannoneer.
- Inside the ruined temple dedicated to Inaya, you’ll find the Shrine in a small chamber directly in your path, making it impossible to miss.
Grasslands Inaya Shrine
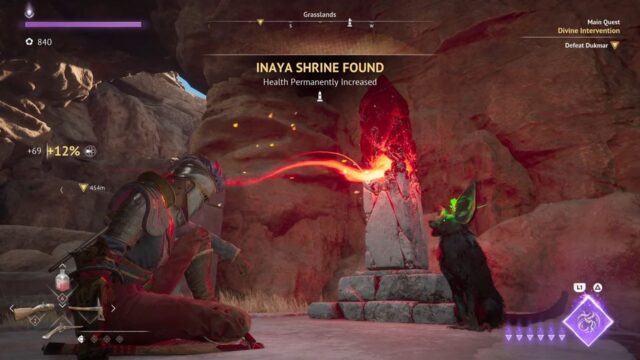
- To find this underground Inaya Shrine, head south from the Ravine’s Secret lodestone, past a hill with rabid wild emus, to a nearby cave entrance.
- Alternatively, from Wisdom’s Edge, follow the cliffs clockwise from the northwest gate to find a cave you can jump into, containing the Shrine.
- Inside, a lever opens a grate, allowing easier access from the other side, but beware of patrolling Dead.
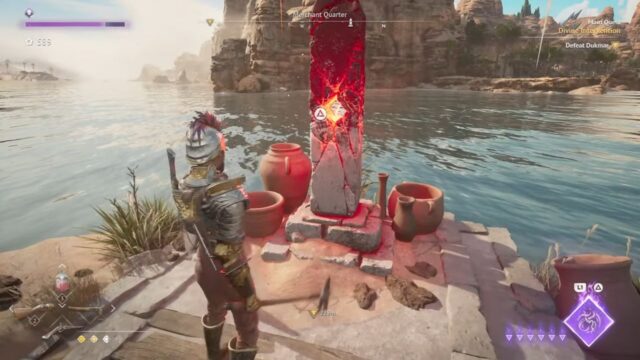
Merchant Quarter Inaya Shrine

- In the City of Sibyl, navigate the war-torn streets to the south until you reach the western docks.
- Use the skull at the pier’s end to create rifts that lead to a small island where you’ll find the final Inaya Shrine.
III. Inaya Shrine in Old Dawn

Tucked away in the Old Dawn area, the final Inaya Shrine remains a secret until the end of the campaign. To find it, look for a building across the gap from the lodestone and leap onto the ledge.
Venture inside and ascend to the upper floor, where the last shrine awaits. However, this one is fiercely guarded by an Armored Dead Warrior, unlike other Inaya Shrines, making it an interesting final challenge.
3. Locations of All Healing Flasks
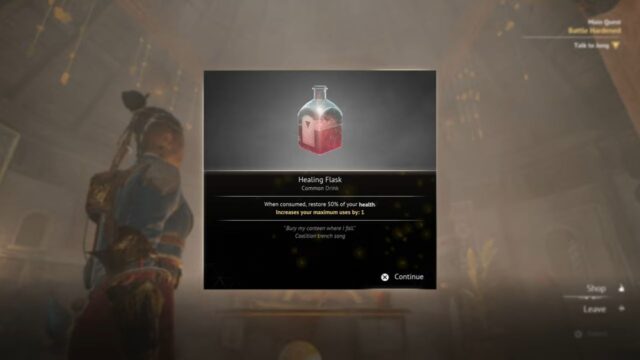
Initially, players have only three healing flasks, a limited supply for a challenging game like Flintlock: The Siege of Dawn. Fortunately, discovering new Coffee Shops scattered throughout the map allows you to increase your healing flask capacity.
To claim your reward, you must liberate the hamlets from enemy control, often led by formidable bandit leaders. Defeating the leader will take time, so be patient. Upon emerging victorious, enter the newly freed Coffee Shop, engage with the host, and collect your well-deserved flask upgrade.
You’ll encounter a total of 7 Coffee Shops, with the first one appearing in Port Solace shortly after meeting Enki, following the tutorial. The remaining six are divided between two regions: Three Peaks and Wanderer’s Rest.
Three Peaks Hamlets
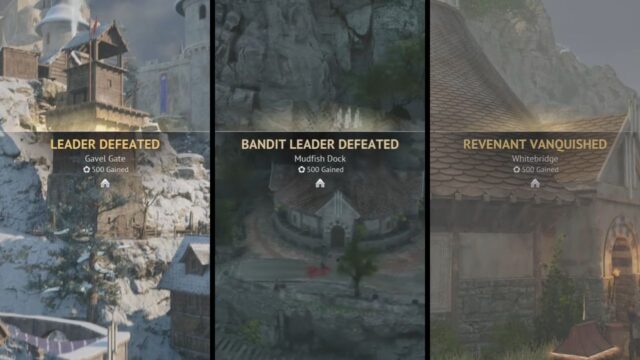
- Gavel Gate: From the Three Peaks camp, head west to find the locked gate. Use the rift skull north of the gate to reach the spire rock, then activate another rift skull to enter the hamlet from the back. Defeat the leader in the center.
- Mudfish Dock: After unlocking Pilgrim’s Bend camp, follow the road south to the Lodestone, then head west to find the hamlet. The leader is in the northwest corner.
- White Bridge: This hamlet is automatically cleared after your first revenant fight. It’s located west of the third campsite.
Wanderer’s Rest Hamlets

- First Anchor: Just outside the initial Wanderer’s Rest camp, find the leader in the middle.
- Backharvest: After the Jagged Ascent sub-boss fight, head north from Sibyl’s Teeth camp to find Backharvest. The leader is in the northeast corner.
- Wisdom’s Edge: Before entering the City of Sibyl, find this hamlet southeast of the optional camp. Clearing it is required to advance the main story.
May the blessings of Goddess Inaya and the warmth of the Coffee Shops remain with you throughout your journey, and may your flasks always be as full as your determination!
4. About Flintlock: The Siege of Dawn
Kill. All. Gods.
Immerse yourself in Flintlock: The Siege of Dawn, a thrilling Souls-lite action RPG that combines the ferocity of divine powers with the intensity of gunpowder-fueled combat.
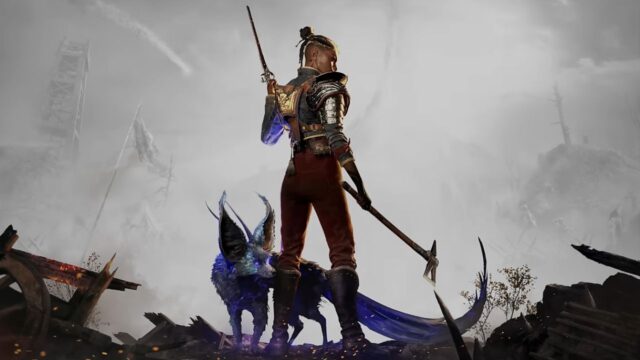
As Nor Vanek, an elite soldier in the Coalition, you’ll embark on a dangerous quest for vengeance against the Gods who have unleashed their wrath upon the world. With the city of Dawn on the brink of destruction, you’ll need to master a range of skills, including magic and gunpowder, to defeat the divine forces and their armies of the dead.
Your ultimate goal is to close the Great Below’s door that has unleashed this chaos upon the world. Will you answer the call to arms and determine the fate of humanity in this gripping battle of Gods versus guns?
On July 18, 2024, this epic struggle will arrive on PlayStation 5, Windows PC, Xbox Series X, and Xbox Series S, courtesy of A44, the talented studio behind the critically acclaimed Ashen.


No Comments on All Inaya Shrines And Healing Flasks Locations in Flintlock: The Siege of Dawn